Skip to content

Roman Shields KS2

Teach your KS2 class about Roman shields and challenge them to make their very own versions with this ready-to-teach lesson. The lesson starts by examining some examples of Roman shields (called scutum), looking at size, patterns and colours.

They are then challenged to design, make and evaluate Roman shields of their own, considering what materials, tools and equipment they will need to complete their designs.

This Roman Shields KS2 DT lesson includes:

  • a detailed lesson plan with differentiated activities
  • a slideshow for the teaching input
  • a range of printable resources for independent learning activities

This lesson is part of a Romans Cross-Curricular Topic for Year 3 and Year 4.

Roman Shields KS2 Lesson Pack

£2.99

Scroll through the pictures for a preview of the lesson's resources:

Roman Shields KS2 Slideshow example 1
Roman Shields KS2 Slideshow example 2
Roman Shields KS2 Slideshow example 3
Roman Shields KS2 Slideshow example 4
Roman Shields KS2 Slideshow example 5
Roman Shields KS2 Slideshow example 6
Roman Shields KS2 Worksheet example 1
Roman Shields KS2 Worksheet example 2
Roman Shields KS2 Worksheet example 3
Roman Shields KS2 Lesson Plan example 1
Roman Shields Facts for KS2 Children and Teachers

Roman Shields

The Roman army was the largest and most powerful fighting force of the ancient world, and its shields (called scutum) were designed for maximum protection for its soldiers. Read on to find out how Roman shields developed, how they were made and how they were used by the military of ancient Rome.

What was a scutum?

The Romans used several different types of shields throughout its history, but the scutum is most widely recognised as being associated with the Roman army. Before the Romans, ancient civilisations, such as the Greeks, used round shields. However, the Romans developed shields that were longer and more oblong in shape to offer more protection for their soldiers. By the first century BCE, they had developed scutum, which were curved and rectangular.

A Roman scutum shield - front and back

The front and back of a Roman scutum shield

How were Roman shields used?

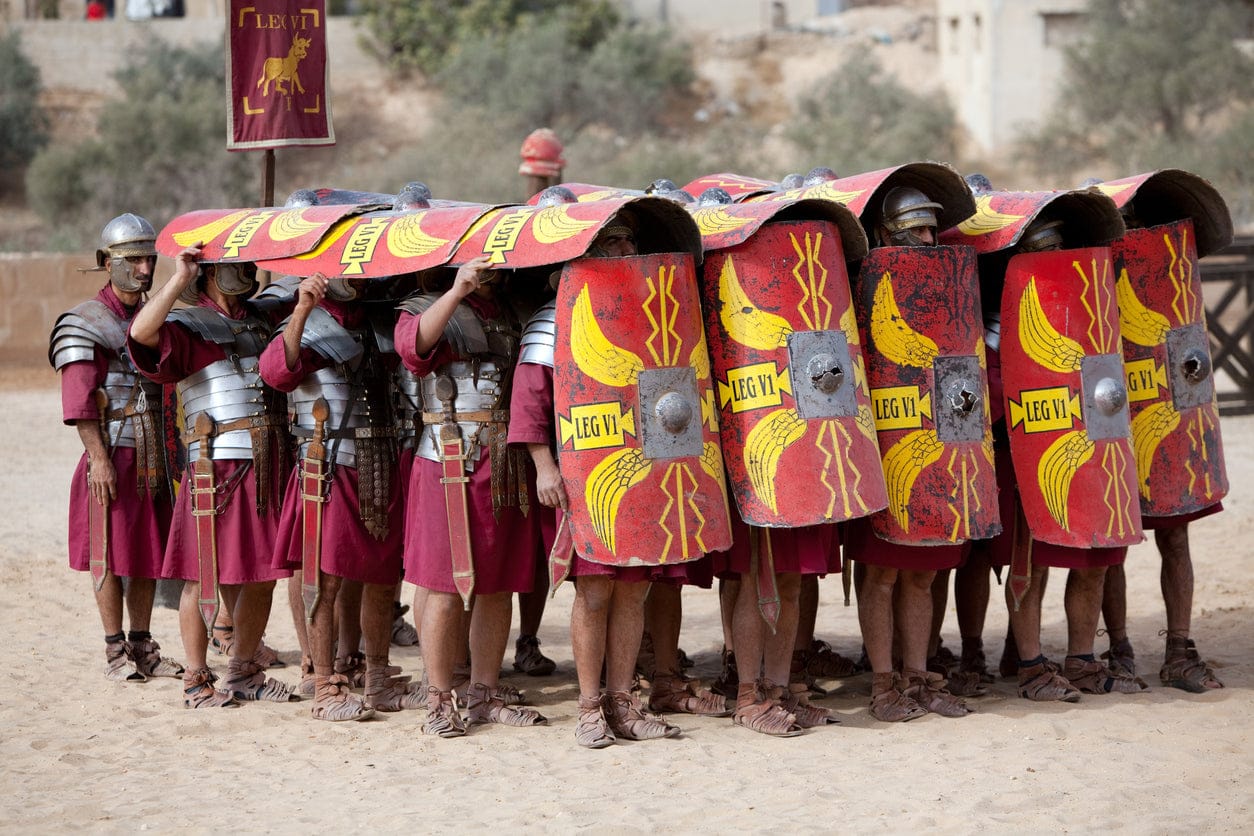
As well as offering greater protection for individual soldiers, scutum shields also allowed the Roman army to advance in a protected formation which was known as a testudo (the Latin word for 'tortoise'). This involved legionnaires standing close together so that their shields could overlap, meaning that the entire formation had a barrier of protection. Any arrows, swords or other weapons that approached the testudo were met with an almost impenetrable wall.

The testudo formation

How was a Roman shield made?

Roman shields were made by gluing three pieces of wood together to make a curved shape. These were then covered with leather and canvas. The edges of the scutum were covered in metal strips to protect the wood and a spindle-shaped boss was placed in the centre. The boss was useful for attacking the enemy.

How big were Roman shields?

Scutum were around 70 cm wide and 100 cm long. They were big enough to cover from a soldier's shoulder to the top of his knee. They weighed 10 kg.

How were Roman shields decorated?

Roman shields were usually painted red, then decorated with lightning bolts or eagles' wings. Lightning was the symbol of Jupiter, the Roman god of sky and thunder, and the eagle wings were a symbol of the Roman army. Some shields were decorated with wreaths, which were a symbol of victory.  

Roman shields were usually painted red

Roman shields were usually painted red and decorated with lightning bolts and eagles' wings